Source: http://cyberarms.wordpress.com/2013/03/14/installing-kali-linux-on-a-raspberry-pi-and-connecting-to-it-remotely/
Installing Kali Linux on a Raspberry Pi and Connecting to it Remotely

Kali is the newest version of the
Backtrack security penetration testing Linux platform. You can run Kali
as a LiveCD or install it to a hard drive. But wouldn’t it be cool if
you could run Kali from a $35 Raspberry Pi computer?
Well you can!
In this article we will look at installing Kali Linux on a Raspberry Pi.
The good folks at Offensive Security have
created a Kali Linux image for the Raspberry Pi, so installation could
not be easier. All you need is a Raspberry Pi, the Kali Image, and an SD
Card. I will also use a Windows system to write the image to the SD
card.
1. Download the Kali Linux Image (Located about halfway down the page)
2. The image file is compressed you will need to expand it.
3. Next, Install the image to your SD card – Disk Imager works great.
Just plug your SD card into your Windows
Laptop, and run Disk Imager. Point the image file to your Kali image
that you downloaded and point the device to the drive letter of your SD
card.
Then just hit “Write”:
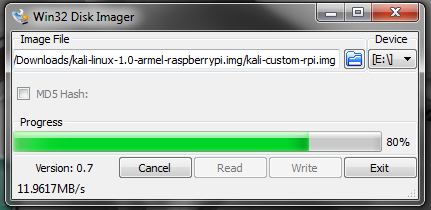
Disk Imager will write the Kali Linux image to your SD card.
4. Now eject the SD card from your
windows laptop and insert it into the SD card slot on your Raspberry Pi.
Connect your video, Ethernet cable, and keyboard and mouse.
5. Connect power to the Raspberry Pi and in a few seconds it will boot up into Kali.
That is it! You know have a Raspberry Pi Pentesting platform!
Connecting to the Raspberry Pi remotely from a Windows system using SSH
Now you can run commands from the command
prompt, or if you want to run the Raspberry Pi headless (without
monitor or keyboard). You can connect to the Pi from a Windows system
remotely using SSH!
To Do so:
1. Download Putty for Windows
2. Run Putty and put in the IP address for your Kali System. You can get this by typing “ifconfig” if you have a keyboard attached or by checking the address given to it by your router if you are running Kali headless.
My IP address was 192.168.1.135 in this case. Also, make sure port 22 is entered and select SSH as shown below:
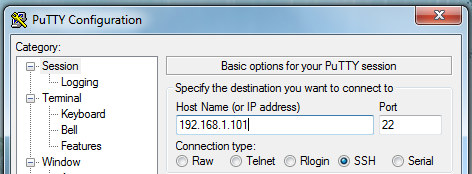
Then just hit “Open”.
You will be asked asked to log into the Raspberry Pi. If this is the first time, just use the Kali default credentials:
Username: root
Password: toor
Password: toor
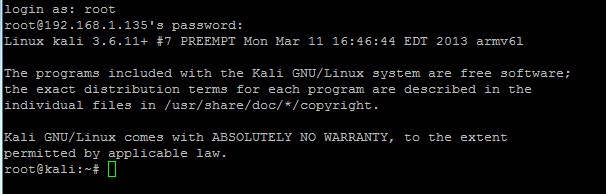
That’s it!
Now you can run any of the commands you want on your Raspberry Pi remotely from your Windows System.
No comments:
Post a Comment