Hướng dẫn - Gõ tiếng Việt cho người mới sử dụng bằng XVNKB
Phần mềm quan trọng nhất nhì với người Việt Nam ta ấy chính là bộ gõ tiếng Việt. Không có bộ gõ tiếng Việt trên máy thì quả thật làm việc gì rồi cũng thấy… bế tắc. Gõ tiếng Việt trên Linux cũng có nhiều cách nhưng cách thông dụng và thân thuộc nhất là dùng xvnkb, một bộ gõ tiếng Việt mã nguồn mở khá có tiếng trong thế giới Chim cánh cụt. Nó hoạt động như Vietkey hay Unikey trên Windows vậy. Mình cũng đang gõ bài post này bằng xvnkb :-D .
Bộ gõ XVNKB hiện nay đã có thể thay thế bằng SCIM với những tính năng tốt hơn cài đặt dễ dàng và giao diện dễ sử dụng hơn.
1. Cài đặt trình biên dịch
Chúng ta sẽ biên dịch từ mã nguồn (đảm bảo nhất) nên sẽ cần tải xuống trình biên dịch. Cái này cũng cần cho những đồng chí lập trình viên nào nuôi ước mơ lập trình trên Linux.
Chọn menu Application > Accessories > Terminal để mở cửa sổ dòng lệnh. Sau đó gõ lệnh sau:
sudo apt-get install build-essential
Chờ cho trình cài đặt tải xuống và giải nén tất cả các gói xong là được. Tuy nhiên xvnkb khi biên dịch cũng yêu cầu phải có thêm gói xorg-dev nữa. Các bạn gõ thêm lệnh sudo apt-get install xorg-dev để cài đặt gói này.
Vậy là xong bước 1.
2. Tải xuống mã nguồn và cài đặt
Trong cửa sổ dòng lệnh gõ wget http://xvnkb.sourceforge.net/xvnkb-0.2.9a.tar.bz2 để tải xuống mã nguồn chương trình. Sau đó giải nén bằng lệnh:
tar -xvf xvnkb-0.2.9a.tar.bz2
Chuyển vào thư mục vừa giải nén và biên dịch, bạn thực hiện tuần tự những lệnh sau:
cd xvnkb-0.2.9a/
./autogen.sh
./configure --use-extstroke
Đến đây phải chỉnh file config.h một chút. Bạn gõ gedit config.h và chỉnh nội dung file thành:
#define __VK_CONFIG_H
#define VK_CHECK_SPELLING
#define VK_USE_EXTSTROKE
#define VK_NEED_UCHAR
(bỏ đi một vài dòng bị lỗi)
Sau đó gõ tiếp các lệnh sau:
make
sudo make install
Chúc mừng, bạn đã cài đặt thành công xvnkb. Bây giờ để khởi động chương trình bạn gõ xvnkb từ cửa sổ dòng lệnh là xong. Nhắp phải chuột lên hộp chương trình của xvnkb để xem menu tuỳ chọn. Nhắp trái chuột để bật tắt tuỳ chọn gõ tiếng Việt.
Nếu muốn xvnkb tự động chạy lúc khởi động, bạn vào menu System > Preferences > Sessions, chọn New và nhập vào ô Command như sau: xvnkb --method=telex --charset=utf8 (trong đó method là telex, vni hoặc viqr; charset là utf8, tcvn, viscii, vps hoặc viqr). Bây giờ xvnkb sẽ khởi động mặc định với kiểu gõ (method) và bảng mã (charset) mà bạn đã chọn.
P/s (afterlastangel):
Bạn nào thích xài XVNKB compile sẵn thì vào đây http://202.78.227.17/Public/ubuntu/pool/extras/x/xvnkb/xvnkb_0.2.9-ubuntu704_i386.deb
Nhưng XVNB vẫn còn xung đột với ổ đĩa CD của bạn vì vậy mình khuyên sử dụng SCIM để tránh xung đột.
------------
SOURCE: http://saylinux.wordpress.com/2007/04/27/cai_dat_bo_go_tieng_viet_xvnkb_cho_ubuntu/
Wednesday 27 August 2008
Tuesday 26 August 2008
How to create custom iso file
It’s rather trivial task to make some changes into already burned installation or live CD. It may be performed to add some files to this CD or edit files on it. In any case it’s impossible to loop mount .iso file and then save it as iso9660 filesystem is read-only.
So, just mount your CD or iso image to some directory by commands:
sudo mkdir /mnt/image
sudo mount /dev/cdrom /mnt/image
or
sudo mount /path/to/your.iso /mnt/image -o loop
then copy it’s contents to some directory:
mkdir /tmp/newiso
cp -r /mnt/image /tmp/newiso
After this you can modify any files in /tmp/newiso, add files, delete them. After modifications are done, create new ISO image to be burned onto CD (or kept somewhere for a rainy day):
cd /tmp/newiso
and
sudo mkisofs -o /tmp/new.iso -b isolinux/isolinux.bin -c isolinux/boot.cat -no-emul-boot -boot-load-size 4 -boot-info-table -J -R -V "new iso name" .
After mkisofs is finished new ISO file will be created at /tmp directory.
-----
Source: http://www.linuxscrew.com/2007/07/31/how-to-create-custom-linux-iso-image/
Eject and close cd tray on ubuntu
eject -T /dev/cdrom
This will eject the disk tray if it is closed, and will close the tray if it's already been ejected
This will eject the disk tray if it is closed, and will close the tray if it's already been ejected
Friday 22 August 2008
Installing software from source in Linux - 1.2
< Installing software from source in Linux - 1.2 >
So you've downloaded a software package with tar.gz or tar.bz2 extension and have no idea what to do with it. Or perhaps you already know that it's most likely the source code of the program you want to install and you have to compile it, but don't know how. Don't worry, compiling and installing software from source in Linux isn't as hard as it may sound!
Author: Nana Långstedt < nana.langstedt at gmail.com >
tuXfile created: 13 July 2002
Last modified: 22 September 2005
contents
* The procedure
* Step 1. Unpacking
* Step 2. Configuring
* Step 3. Building
* Step 4. Installing
* Cleaning up the mess
* Uninstalling
back to
* Linux software
* Linux help
* tuXfiles home
< The procedure >
The installation procedure for software that comes in tar.gz and tar.bz2 packages isn't always the same, but usually it's like this:
# tar xvzf package.tar.gz (or tar xvjf package.tar.bz2)
# cd package
# ./configure
# make
# make install
If you're lucky, by issuing these simple commands you unpack, configure, compile, and install the software package and you don't even have to know what you're doing. However, it's healthy to take a closer look at the installation procedure and see what these steps mean.
< Step 1. Unpacking >
Maybe you've already noticed that the package containing the source code of the program has a tar.gz or a tar.bz2 extension. This means that the package is a compressed tar archive, also known as a tarball. When making the package, the source code and the other needed files were piled together in a single tar archive, hence the tar extension. After piling them all together in the tar archive, the archive was compressed with gzip, hence the gz extension.
Some people want to compress the tar archive with bzip2 instead of gzip. In these cases the package has a tar.bz2 extension. You install these packages exactly the same way as tar.gz packages, but you use a bit different command when unpacking.
It doesn't matter where you put the tarballs you download from the internet but I suggest creating a special directory for downloaded tarballs. In this tutorial I assume you keep tarballs in a directory called dls that you've created under your home directory. However, the dls directory is just an example. You can put your downloaded tar.gz or tar.bz2 software packages into any directory you want. In this example I assume your username is me and you've downloaded a package called pkg.tar.gz into the dls directory you've created (/home/me/dls).
Ok, finally on to unpacking the tarball. After downloading the package, you unpack it with this command:
me@puter: ~/dls$ tar xvzf pkg.tar.gz
As you can see, you use the tar command with the appropriate options (xvzf) for unpacking the tarball. If you have a package with tar.bz2 extension instead, you must tell tar that this isn't a gzipped tar archive. You do so by using the j option instead of z, like this:
me@puter: ~/dls$ tar xvjf pkg.tar.bz2
What happens after unpacking, depends on the package, but in most cases a directory with the package's name is created. The newly created directory goes under the directory where you are right now. To be sure, you can give the ls command:
me@puter: ~/dls$ ls
pkg pkg.tar.gz
me@puter: ~/dls$
In our example unpacking our package pkg.tar.gz did what expected and created a directory with the package's name. Now you must cd into that newly created directory:
me@puter: ~/dls$ cd pkg
me@puter: ~/dls/pkg$
Read any documentation you find in this directory, like README or INSTALL files, before continuing!
< Step 2. Configuring >
Now, after we've changed into the package's directory (and done a little RTFM'ing), it's time to configure the package. Usually, but not always (that's why you need to check out the README and INSTALL files) it's done by running the configure script.
You run the script with this command:
me@puter: ~/dls/pkg$ ./configure
When you run the configure script, you don't actually compile anything yet. configure just checks your system and assigns values for system-dependent variables. These values are used for generating a Makefile. The Makefile in turn is used for generating the actual binary.
When you run the configure script, you'll see a bunch of weird messages scrolling on your screen. This is normal and you shouldn't worry about it. If configure finds an error, it complains about it and exits. However, if everything works like it should, configure doesn't complain about anything, exits, and shuts up.
If configure exited without errors, it's time to move on to the next step.
< Step 3. Building >
It's finally time to actually build the binary, the executable program, from the source code. This is done by running the make command:
me@puter: ~/dls/pkg$ make
Note that make needs the Makefile for building the program. Otherwise it doesn't know what to do. This is why it's so important to run the configure script successfully, or generate the Makefile some other way.
When you run make, you'll see again a bunch of strange messages filling your screen. This is also perfectly normal and nothing you should worry about. This step may take some time, depending on how big the program is and how fast your computer is. If you're doing this on an old dementic rig with a snail processor, go grab yourself some coffee. At this point I usually lose my patience completely.
If all goes as it should, your executable is finished and ready to run after make has done its job. Now, the final step is to install the program.
< Step 4. Installing >
Now it's finally time to install the program. When doing this you must be root. If you've done things as a normal user, you can become root with the su command. It'll ask you the root password and then you're ready for the final step!
me@puter: ~/dls/pkg$ su
Password:
root@puter: /home/me/dls/pkg#
Now when you're root, you can install the program with the make install command:
root@puter: /home/me/dls/pkg# make install
Again, you'll get some weird messages scrolling on the screen. After it's stopped, congrats: you've installed the software and you're ready to run it!
Because in this example we didn't change the behavior of the configure script, the program was installed in the default place. In many cases it's /usr/local/bin. If /usr/local/bin (or whatever place your program was installed in) is already in your PATH, you can just run the program by typing its name.
And one more thing: if you became root with su, you'd better get back your normal user privileges before you do something stupid. Type exit to become a normal user again:
root@puter: /home/me/dls/pkg# exit
exit
me@puter: ~/dls/pkg$
< Cleaning up the mess >
I bet you want to save some disk space. If this is the case, you'll want to get rid of some files you don't need. When you ran make it created all sorts of files that were needed during the build process but are useless now and are just taking up disk space. This is why you'll want to make clean:
me@puter: ~/dls/pkg$ make clean
However, make sure you keep your Makefile. It's needed if you later decide to uninstall the program and want to do it as painlessly as possible!
< Uninstalling >
So, you decided you didn't like the program after all? Uninstalling the programs you've compiled yourself isn't as easy as uninstalling programs you've installed with a package manager, like rpm.
If you want to uninstall the software you've compiled yourself, do the obvious: do some old-fashioned RTFM'ig. Read the documentation that came with your software package and see if it says anything about uninstalling. If it doesn't, you can start pulling your hair out.
If you didn't delete your Makefile, you may be able to remove the program by doing a make uninstall:
root@puter: /home/me/dls/pkg# make uninstall
If you see weird text scrolling on your screen (but at this point you've probably got used to weird text filling the screen? :-) that's a good sign. If make starts complaining at you, that's a bad sign. Then you'll have to remove the program files manually.
If you know where the program was installed, you'll have to manually delete the installed files or the directory where your program is. If you have no idea where all the files are, you'll have to read the Makefile and see where all the files got installed, and then delete them.
Useful links for ubuntu beginners and solutions to common problems
Common Specific Tasks
Graphic Card Drivers
List of ATI supported cards: https://wiki.ubuntu.com/HardwareSupportComponentsVideoCardsAti
ATI Drivers: http://wiki.cchtml.com/index.php/Ubuntu
Nvidia Drivers: http://doc.gwos.org/index.php/Latest_Nvidia_Edgy
Screen Resolution Problems https://help.ubuntu.com/community/FixVideoResolutionHowto
Getting Support for Restricted/Proprietary Formats (mp3, playing DVDs, windows media, quicktime, etc): https://help.ubuntu.com/community/RestrictedFormats
mp3 support in amaroK: http://strabes.wordpress.com/2007/04/01/get-mp3-support-for-amarok-in-kubuntu-linux/
NTFS with read/write support: http://ubuntuforums.org/showthread.php?t=217009
Restoring GRUB after a Windows install:
https://help.ubuntu.com/community/RecoveringUbuntuAfterInstallingWindows
http://supergrub.forjamari.linex.org/
Resizing Partitions: http://gparted.sourceforge.net/livecd.php
Beginner Questions
Installing Software:
http://cutlersoftware.com/ubuntuinstall/
http://monkeyblog.org/ubuntu/installing/
http://www.psychocats.net/ubuntu/installingsoftware
What is a Repository?: https://help.ubuntu.com/community/Repositories
Managing Repositories: https://help.ubuntu.com/community/Repositories/Ubuntu
File Permissions and Editing Files that Belong to Root: http://www.psychocats.net/ubuntu/permissions
Introduction to the Command Line http://doc.gwos.org/index.php/CommandLineBeginners
What is “sudo” ? https://help.ubuntu.com/community/RootSudo
Basic Commands: https://help.ubuntu.com/community/BasicCommands
http://www.linuxcommand.org/
Great Information Resources
Great for beginners with tons of howtos: http://www.ubuntuguide.org/
Ubuntu Community Documentation: https://help.ubuntu.com/community/
How to Help Yourself: http://www.ubuntuforums.org/showthread.php?p=812448
Thursday 21 August 2008
Enable and disable root account on Ubuntu
Enable root:
sudo passwd root
Disable root:
sudo passwd -l root
sudo passwd root
Disable root:
sudo passwd -l root
Ubuntu: Change the default Terminal window size
The default size of the Terminal window is around 80 columns wide and 24 columns high. To alter this, edit the file /usr/share/vte/termcap/xterm. You can use the following command:
sudo gedit /usr/share/vte/termcap/xterm
Just a few lines from the top will be the line reading:
:co#80:it#8:li#24:\
Change the number right after co# to change the width. Change the number right after li# to change the height.
sudo gedit /usr/share/vte/termcap/xterm
Just a few lines from the top will be the line reading:
:co#80:it#8:li#24:\
Change the number right after co# to change the width. Change the number right after li# to change the height.
Access Ubuntu shares from Windows pc
1. Install samba on the ubuntu machine
sudo apt-get install samba
2. Right click on the folder to share and choose Share Options. Fill in necessary info.
3. Add samba user account to Ubuntu machine
sudo smbpasswd -a
Note: should exist on the Ubuntu machine
Enter password two times
4. On the Windows pc, type in Run: \\\ and type in username and password.
sudo apt-get install samba
2. Right click on the folder to share and choose Share Options. Fill in necessary info.
3. Add samba user account to Ubuntu machine
sudo smbpasswd -a
Note:
Enter password two times
4. On the Windows pc, type in Run: \\
Fyodor Answers Your Network Security Questions
Fyodor Answers Your Network Security Questions
Posted by Roblimo on Fri May 30, 2003 11:40 AM
from the eating-script-kiddies-for-breakfast dept.
4) Stepping into a network security career
by Anonymous Coward
I'll be graduating this month with a shiny new BS in Computer Science. I've done plenty of Unix sysadmin work throughout college and even deployed some high-interaction honeynets. I'm very interested in network security and systems programming. Do you have any advice for people in my situation who want to head into a career in network security?
Fyodor
Congratulations on your graduation! Unfortunately (for newcomers), the security field is one that often expects substantial experience and references. This is partly because these jobs require extraordinary trust, and also because of an aversion to mistakes. Everyone makes mistakes, but they can be extraordinarily costly in security and neophytes tend to make more of them. But don't lose hope! Talented security minds are still in very high demand, just be aware that you will have to work even harder to prove yourself.
Here are my suggestions for anyone starting out in network security, whether for fun or profit:
Step 1: Learn everything you can
1. You may wish to start with reading a general overview of security, such as Practical Unix and Internet Security 3rd Edition.
2. Reading alone won't teach you much. Hands-on experience is critical, so I would set up at least a basic test network. At the very minimum you should have a Unix box or two and a Windows machine (because these are very common in the real world). You can use very cheap machines, or even emulate a large network with virtualization software such as VMWare.
3. Next you should learn more about how attacks are performed. Take a look at the excellent and free Open Source Security Testing Methodology Manual (OSSTMM). This document aims to provide a comprehensive framework for security testing. But it mostly lists tasks to perform, without specifying how to do so. You will gain a lot from this manual if you research the tasks you don't know how to complete, and if you actually try performing the tasks on your test network. If this manual is too curt or hard to follow, you could try a more verbose book on vulnerability assessment, such as Hacking Exposed 4th Edition.
4. Now that you understand many of the general security ideas, it is time to get current. This is one area that has actually become easier in the last decade. The thinking used to be that vulnerability information should only be distributed to well-known and trusted administrators and security researchers through private digests such as Zardoz. This was a disaster for many reasons, and the full disclosure movement was born. In the last couple of years things have started to shift toward more limited ("responsible") disclosure and there is also a disturbing pay-money-for-early-disclosure trend. But information is still much more available than it used to be. Most of the news is carried on mailing lists, and I archive the ones I consider the best at Lists.Insecure.Org. You must subscribe to Bugtraq, and I would also highly recommend pen-test, vuln-dev, and security-basics. Read at least the last 6-12 months of archives. Choose other lists that correspond to your interests. SecurityFocus also offers a security-jobs list which is an excellent resource for finding jobs or just understanding what employers desire.
There are two major reasons for reading Bugtraq. One is that you must react quickly to new vulnerabilities by patching your servers, notifying your clients, etc. You can get this by simply scanning the subject lines or advisory summaries for bugs that directly apply to you. But then you will miss out on another crucial purpose of Bugtraq. Actually understanding a vulnerability helps you defend against it, exploit it, and identify/prevent similar bugs in the future. When you are lucky, the advisory itself will provide full details on the bug. Check out this excellent recent advisory by Core Security Technologies. Note how they describe exactly how the Snort TCP Stream Reassembly vulnerability works in detail and even include a proof-of-concept demonstration. Unfortunately, not all advisories are so forthcoming. For bugs in Open Source software, you can understand the problem by reading the diff. The next step is to actually write and test an exploit. I would recommend writing at least one for each general class of bug (buffer overflow, format string, SQL injection, etc.) or whenever a bug is particularly interesting.
Be sure to read the latest issues of Phrack and the research papers posted to the mailing lists. Send your comments and questions to the authors and you may start interesting discussions. Read well-regarded books on the security topics that interest you most.
I can't emphasize enough that you should intersperse hands-on work with all of this reading. Install unpatched RedHat 8 (or whatever) and run Nmap and Nessus against it. Then compromise it remotely, maybe via the latest Samba hole. Start out with a prewritten exploit from Bugtraq, which isn't quite as easy as it sounds. You may have to modify the 'sploit to compile, brute force the proper offset, etc. Then break in again using a different technique, and your own exploit. Install Ethereal and/or tcpdump and ensure you understand the traffic on your network during both your exploitation and normal network activity. Install Snort on an Internet-facing machine and watch the attacks and probes you'll experience. Wander around your neighborhood with Kismet, Netstumbler, or Wellenreiter on your Laptop or PDA to look for open WAPs. Install DSniff and execute an active MITM attack on an SSH or SSL connection between two of your computers. Take a look at my Top 75 Tools List and ensure you understand what each does and when it would be useful. Try out as many as you can.
5. Take a vacation, or at least a weekend camping! You deserve it! The steps above would probably take at least 3-12 months full-time, depending on your motivation level and the depth and breadth of your research.
Step 2: Now apply your newfound knowledge
Now you have learned enough to be dangerous. At this point, you would have little trouble obtaining most certifications, after studying the specifics of each topic. If your main goal is to find a job quickly, perhaps adding these extra feathers to your cap might be worthwhile. But I think your best bet is to prove your knowledge by joining and contributing to the security community. While this does indeed help others, it isn't an entirely selfless act. It improves your skills, leads to important contacts, and demonstrates your knowledge and ability in a constructive way. The latter is important if securing a career is one of your goals. These steps should also be fun! If not, perhaps you should keep looking at other fields. Here are some ideas:
Start participating with insightful comment and answers on the mailing lists. This is very easy and serves as a great learning experience, way to meet people, and garners some name recognition. If a security manager with a stack of 60 resumes recognizes your name, that is a huge win!
When a new worm or a big new vulnerability comes out, everyone wants to know the details. If you stay up all night disassembling the worm/patch and write the first comprehensive analysis, many folks will find that valuable. And you will learn a lot. Let your first priority be quality - if someone beats you to it, just compare your results with theirs to see if you (or they) missed (or misinterpreted) anything. You can also post your own exploits, although that is more of a political hot potato.
Attending security conferences is a great way to learn, party with fellow hackers, and network (in every sense of the word). Much better is to speak at these conferences. This field changes rapidly so there are always new topics and technologies to discuss. You don't have to be a well-known expert with a long history - just learn your topic well and put in the effort for a quality presentation. You could present at Defcon, at one of the more commercial events, or at a smaller regional con like ToorCon, CodeCon, Hivercon, etc. Among other advantages (often free admission/travel/hotel), this is a great way to meet people with similar interests. I spoke at the latest CanSecWest and have submitted a proposal for the next Defcon.
Now that you've seen and understand a wide variety of software vulnerabilities from your Bugtraq research, start finding your own. You can start by downloading any PHP app from Sourceforge. Most of those are hopelessly vulnerable to Cross-Site-Scripting, SQL injection, and/or remote code execution by "remote include" directives. Many (if not most) Windows shareware daemons are also vulnerable to simple buffer overflows and format-string bugs. Notify the authors and then write an advisory. After a few of these "easy targets", try breaking some more widely deployed programs.
Write a security tool! I could list some suggestions, but by this point you will have many of your own ideas as to what is needed. Scratch an itch.
I hope this helps. If you want more suggestions, Ask Slashdot. From that story, I found this post particularly insightful, especially the emphasis on "people skills". I don't claim to have any, but understand the value :).
Install scanner on Ubuntu
Sử dụng máy scan trên Ubuntu 8.04 LTS Desktop
17:00' 19/08/2008 (GMT+7)
- Mách bạn các bước sử dụng scanner khi cài đặt và sử dụng chúng trên Ubuntu, cùng cách xử lý các scanner chưa được Ubuntu hỗ trợ.
Kiểm tra scanner
Muốn xác định scanner có được Ubuntu hỗ trợ hay chưa, bạn thực hiện theo một trong ba cách:
Cách 1. Cắm dây cáp nối thiết bị vào máy tính, thường là cổng USB. Sau đó, chạy chương trình scan trên Ubuntu có tên XSane.
Nếu màn hình chính của XSane xuất hiện mà không có thông báo lỗi, máy scan của bạn đã được Ubuntu hỗ trợ. Khi đó, bạn đến ngay phần 2 để bắt đầu sử dụng máy scan.
Ngược lại, nếu có thông báo lỗi, thường là “No devices available” thì bạn cần đến phần 3 để tiến hành các bước cài đặt driver.
Cách 2. Một cách khác, rõ ràng hơn, bạn truy cập vào địa chỉ https://wiki.ubuntu.com/HardwareSupportComponentsScanners, chọn nhà sản xuất thiết bị tương ứng như Canon, Dell, HP..., sau đó kích vào liên kết tương ứng để tìm xem thiết bị scanner của mình có thuộc vào danh sách được Ubuntu hỗ trợ sẵn hay không. Nếu có, bạn đến ngay phần 2 để bắt đầu với máy scan của mình.
Cách 3. Nếu máy scan của bạn không có trong danh sách được Ubuntu hỗ trợ, bạn truy cập vào địa chỉ www.sane-project.org/sane-backends.html để xem danh sách các máy scan được SANE (Scanner Access Now Easy) hỗ trợ. SANE là một dự án cung cấp hầu hết các driver cho thiết bị scanner trên Ubuntu.
Nếu thiết bị của bạn thuộc danh sách này, bạn cần cài đặt driver như sau:
+ Cập nhật danh sách phần mềm hệ thống: root@hdhhac-desktop:~# apt-get update
+ Cài đặt thư viện libsane-extras bằng cách sử dụng chương trình Synaptic, hoặc gõ lệnh sau:
root@hdhhac-desktop:~# apt-get install libsane-extras
Lệnh này sẽ cài đặt các driver dành cho máy scan được dự án SANE hỗ trợ.
+ Mở file /etc/sane.d/dll.conf để xem thiết bị scanner của mình đã có trong danh sách liệt kê hay chưa: root@hdhhac-desktop:~# vim /etc/sane.d/dll.conf
Nếu ngay trước dòng tương ứng với tên máy scan của mình có dấu chú thích (#), bạn cần xóa dấu này đi để kích hoạt driver tương ứng với thiết bị của mình.
+ Đến đây, bạn mở chương trình XSane và bắt đầu sử dụng máy scan với driver vừa được cài đặt.
Sử dụng máy scan
Bạn cần sử dụng phần mềm tương tác với máy scan để có được các hình ảnh như mong muốn. Trên Ubuntu, mọi người thường sử dụng XSane để phục vụ cho mục đích này. Phần mềm này sử dụng SANE-library để giao tiếp với các máy scan. Tuy có hỗ trợ camera và các thiết bị video với những tác vụ cơ bản, nhưng XSane được thiết kế với mục đích chính là dành cho máy scan.
Với XSane, bạn có thể dễ dàng sao chép các trang văn bản, sau đó lưu trữ dưới dạng hình ảnh và thực hiện các thao tác fax hoặc chuyển qua email. Bạn có thể sử dụng XSane để lưu trữ hình ảnh thu được ở dạng multi-page documents chứ không chỉ là những hình ảnh riêng biệt. Cần đến với website http://XSane.org để tham khảo đầy đủ thông tin về chương trình hỗ trợ scan hữu ích này.
Để scan một trang tài liệu, bạn tiến hành các bước như sau:
1. Đặt trang tài liệu vào trong máy scan.
2. Khởi chạy XSane bằng cách vào menu Applications -> Graphics -> XSane Image Scanner. Bạn cũng có thể bấm vào nút Scan ngay trên máy scan để thực hiện thao tác này.
3. Trên cửa sổ chính của XSane, bạn bấm nút Scan để thực hiện thao tác quét trang tài liệu của mình. Khi tiến trình scan kết thúc, bạn sẽ nhận được kết quả ngay trên cửa sổ Viewer của XSane. Tại đây, bạn lưu ảnh từ menu File -> Save image dưới một trong các định dạng như JPEG, PDF, PNG, PNM...; hoặc thực hiện một vài thao tác xử lý như thay đổi kích thước của ảnh, thay đổi chiều hiển thị của ảnh...
Wednesday 20 August 2008
INSTALLING TRUETYPE FONTS:
INSTALLING TRUETYPE FONTS:
In Short: The simple copy and paste method of installing your fonts.
Copy the code below:
gksu nautilus /usr/share/fonts/truetype
Open the terminal:
Applications > Accessories > Terminal
Paste the code into the Terminal: Edit > Paste.
Push the Enter Key on your keyboard and then enter your password and then click OK.
Nautilus should open to the truetype folder.
Make a new folder (of the name of your choice).
How? Right click with the mouse in the truetype folder we just opened and choose Create Folder and give the folder a name.
Double click the folder to open it.
Add your fonts to the directory you made by copying them and then just pasting them into the folder…
Alert Ubuntu that you added the fonts.
Copy the code below:
sudo fc-cache -f -v
Open the terminal:
Applications > Accessories > Terminal
Paste the code into the Terminal: Edit > Paste.
Push the Enter Key on your keyboard (and then enter your password if needed).
The command above adds them into the system so they become available.
Ubuntu Global Shortcut Keys
Global shortcut keys enable you to use the keyboard to perform tasks related to your desktop, rather than tasks on the currently selected window or application. The following table lists some global shortcut keys:
Shortcut Key
Function
Alt+F1
Open the Applications Menu.
Alt+F2
Display the Run Application dialog. See the section called “Running Applications” for more information.
Print Screen
Take a screenshot of the entire desktop. See the section called “Taking Screenshots” for more information.
Alt+Print Screen
Take a screenshot of the currently focused window.
Ctrl+Alt+Arrow keys
Switch to the workspace to the specified direction of the current workspace. See the section called “Workspaces” for more information on working with multiple workspaces.
Ctrl+Alt+D
Minimize all windows and give focus to the desktop.
Alt+Tab
Switch between windows. A list of windows that you can select is displayed. Release the keys to select a window. You can press the Shift key to cycle through the windows in reverse order.
Ctrl+Alt+Tab
Switch the focus between the panels and the desktop. A list of items that you can select is displayed. Release the keys to select an item. You can press the Shift key to cycle through the items in reverse order.
Window Shortcut Keys
Window shortcut keys allow you to use the keyboard to perform tasks on the currently focused window. The following table lists some window shortcut keys:
Shortcut Key
Function
Alt+Tab
Switch between windows. A list of windows that you can select is displayed. Release the keys to select a window. You can press the Shift key to cycle through the windows in reverse order.
Alt+F4
Close the currently focused window.
Alt+F5
Unmaximize the current window, if it is maximized.
Alt+F7
Move the currently focused window. After pressing this shortcut, you can move the window using either the mouse or the arrow keys. To finish the move, click the mouse or press any key on the keyboard.
Alt+F8
Resize the currently focused window. After pressing this shortcut, you can resize the window using either the mouse or the arrow keys. To finish the resize, click the mouse or press any key on the keyboard.
Alt+F9
Minimize the current window.
Alt+F10
Maximize the current window.
Alt+spacebar
Open the window menu for the currently selected window. The window menu allows you to perform actions on the window, such as minimizing, moving between workspaces, and closing.
Shift+Ctrl+Alt+Arrow keys
Move the current window to another workspace in the specified direction. See the section called “Workspaces” for more information on working with multiple workspaces.
Application Keys
Application shortcut keys enable you to perform application tasks. You can use shortcut keys to perform application tasks more quickly than if you use a mouse. The following table lists some common application shortcut keys:
Shortcut Key
Action
Ctrl+N
Create a new document or window.
Ctrl+X
Cut the selected text or region and place it on the clipboard.
Ctrl+C
Copy the selected text or region onto the clipboard.
Ctrl+V
Paste the contents of the clipboard.
Ctrl+Z
Undo the last action.
Ctrl+S
Save the current document to disk.
F1
Load the online help document for the application.
In addition to these shortcut keys, all applications support a set of keys to navigate and work with the user interface. These keys allow you to perform operations that you might normally perform with a mouse. The following table describes some interface control keys:
Keys
Action
Arrow keys or Tab
Move between controls in the interface or items in a list.
Enter or spacebar
Activate or choose the selected item.
F10
Activate the left-most menu of the application window.
Shift+F10
Activate the context menu for the selected item.
Esc
Close a menu without selecting a menu item, or cancel a drag operation.
Shortcut Key
Function
Alt+F1
Open the Applications Menu.
Alt+F2
Display the Run Application dialog. See the section called “Running Applications” for more information.
Print Screen
Take a screenshot of the entire desktop. See the section called “Taking Screenshots” for more information.
Alt+Print Screen
Take a screenshot of the currently focused window.
Ctrl+Alt+Arrow keys
Switch to the workspace to the specified direction of the current workspace. See the section called “Workspaces” for more information on working with multiple workspaces.
Ctrl+Alt+D
Minimize all windows and give focus to the desktop.
Alt+Tab
Switch between windows. A list of windows that you can select is displayed. Release the keys to select a window. You can press the Shift key to cycle through the windows in reverse order.
Ctrl+Alt+Tab
Switch the focus between the panels and the desktop. A list of items that you can select is displayed. Release the keys to select an item. You can press the Shift key to cycle through the items in reverse order.
Window Shortcut Keys
Window shortcut keys allow you to use the keyboard to perform tasks on the currently focused window. The following table lists some window shortcut keys:
Shortcut Key
Function
Alt+Tab
Switch between windows. A list of windows that you can select is displayed. Release the keys to select a window. You can press the Shift key to cycle through the windows in reverse order.
Alt+F4
Close the currently focused window.
Alt+F5
Unmaximize the current window, if it is maximized.
Alt+F7
Move the currently focused window. After pressing this shortcut, you can move the window using either the mouse or the arrow keys. To finish the move, click the mouse or press any key on the keyboard.
Alt+F8
Resize the currently focused window. After pressing this shortcut, you can resize the window using either the mouse or the arrow keys. To finish the resize, click the mouse or press any key on the keyboard.
Alt+F9
Minimize the current window.
Alt+F10
Maximize the current window.
Alt+spacebar
Open the window menu for the currently selected window. The window menu allows you to perform actions on the window, such as minimizing, moving between workspaces, and closing.
Shift+Ctrl+Alt+Arrow keys
Move the current window to another workspace in the specified direction. See the section called “Workspaces” for more information on working with multiple workspaces.
Application Keys
Application shortcut keys enable you to perform application tasks. You can use shortcut keys to perform application tasks more quickly than if you use a mouse. The following table lists some common application shortcut keys:
Shortcut Key
Action
Ctrl+N
Create a new document or window.
Ctrl+X
Cut the selected text or region and place it on the clipboard.
Ctrl+C
Copy the selected text or region onto the clipboard.
Ctrl+V
Paste the contents of the clipboard.
Ctrl+Z
Undo the last action.
Ctrl+S
Save the current document to disk.
F1
Load the online help document for the application.
In addition to these shortcut keys, all applications support a set of keys to navigate and work with the user interface. These keys allow you to perform operations that you might normally perform with a mouse. The following table describes some interface control keys:
Keys
Action
Arrow keys or Tab
Move between controls in the interface or items in a list.
Enter or spacebar
Activate or choose the selected item.
F10
Activate the left-most menu of the application window.
Shift+F10
Activate the context menu for the selected item.
Esc
Close a menu without selecting a menu item, or cancel a drag operation.
Gnome or KDE is screwey; how do I reset my Gnome or KDE configuration?
The Gnome and KDE desktop environments can get into such a state that they either won't start or start more-or-less uselessly. Or you may just have configured a miserable combination of fonts, colours and desktop images and want to start afresh. In either case, it's simply a matter of logging out, renaming the configuration folder(s) and starting the desktop again.
Note that when you reset your configuration, you will lose all customizations made under those environments. For example: resetting your KDE configuration will reset your Konqueror bookmarks and cache, your Kmail settings, and your desktop wallpaper; resetting Gnome will result in your losing your theme settings, your Epiphany bookmarks, and your Nautilus settings. You can restore some of these settings by copying in specific files and folders from the backups made with the commands below.
KDE
All KDE settings are in a single folder in your home directory: .kde. Simply rename the folder:
1. logout
2. press Alt-Ctrl-F1 to switch to a console login
3. login
4. rename the .kde folder to .kde.date_and_time:
cd ~
mv .kde .kde.`date +%Y%m%d.%H%M`
exit
5. press Alt-Ctrl-F7 and login
You will now have no .kde folder so KDE will start afresh when you next login; your old settings are in .kde.date_and_time.
Gnome
1. logout
2. press Alt-Ctrl-F1 to switch to a console login
3. login
4. rename the Gnome folders to folder_name.date_and_time:
cd ~
tcsh
foreach d (.gnome .gnome2 .gconf .gconf2 .gnome-private .gnome2-private)
set dt=`date +%Y%m%d.%H%M`
mv $d $d.$dt
end
exit
5. press Alt-Ctrl-F7 and login
You will now have no Gnome folders so Gnome will start afresh when you next login; your old settings are scattered in the various .g* folders; frankly, I'm note sure which are where. But you may well find that you can save some of your settings by doing the following:
1. do steps 1 to 5 above
2. logout
3. press Alt-Ctrl-F1 to switch to a console login
4. login
5. replace the new .gconf folder with your original one:
cd ~
mv .gconf .gconf.fresh
\cp -pr .gconf.date_and_time to .gconf
exit
6. press Alt-Ctrl-F7 and login
Tuesday 19 August 2008
Tips for new Ubuntu user
Ubuntu has become the most popular Linux distribution for new Linux users. It's easy to install, easy to use, and usually "just works." But moving to a different operating system can be confusing, no matter how well-designed it is.
Here's a list of tips that might save you some time while you're getting used to Ubuntu.
1. Getting multimedia to work
The default Ubuntu install contains free software only, which means that it doesn't support some popular multimedia formats straight out of the box. This is inconvenient, but the Ubuntu folks have good reasons for not shipping with support for MP3, DVDs, and so forth -- including that software could cause them some legal headaches, or incur some serious fees.
Fortunately, as a user, you don't need to worry about fees (though some of the packages may not be legal due to patent restrictions or restrictions on circumventing copy protection, depending on where you live). The Ubuntu wiki has a page on restricted formats that explains how to get the packages you need. However, if you run Ubuntu on AMD64 or PowerPC hardware, you'll still be out in the cold for some of the packages, since some multimedia formats depend on proprietary software that's not available for those hardware platforms.
2. Changing the defaults
Ubuntu comes with a number of defaults that may or may not be to your liking. For example, the default editor is set to Nano, which isn't optimal if you're used to Vim.
The easy way to change this is to use the update-alternatives program, which maintains the symbolic links under /etc/alternatives that determine the default programs for FTP, system editor, rsh, Telnet, window manager, and so forth. Look under the /etc/alternatives directory to see what programs are managed.
To change the default editor, run sudo update-alternatives --config editor. You'll see a dialog like this:
There are 3 alternatives which provide `editor'.
Selection Alternative
-----------------------------------------------
1 /usr/bin/vim
2 /bin/ed
*+ 3 /bin/nano
Press enter to keep the default[*], or type selection number:
Just type 1 to switch to Vim. Note that on my system, I don't have Emacs or many other editors installed; if I did, the utility would offer the other editors as choices.
games_final_batlle.jpg
3. How to install packages
Most of the application software you'll want to add to your system will be available through the Ubuntu repositories using Synaptic, Adept, or another package management tool. What if you want to install something like Opera that is available as a package for Ubuntu, but isn't in the repositories?
In that case, download the application's Debian package (.deb) and right-click on the file. At the top of the context menu, you should see an option to open the package with the GDebi package installer. GDebi will provide a description of the package, what files are included, and other details about the package. The package installer also has a Install Package button; just click that and it will install the package. Note that the package installer also checks to verify whether it can install the package -- if it has dependencies that can't be satisfied, GDebi will give an error and refuse to install it.
If you prefer to install packages at the command line, just use sudo dpkg -i packagename.deb.
4. Sudo and gksudo
If you've used Linux for any amount of time, you might be used to running programs as root directly whenever you need to install packages, modify your system's configuration, and so on. Ubuntu employs a different model, however. The Ubuntu installer doesn't set up a root user -- a root account still exists, but it's set with a random password. Users are meant to do administration tasks using sudo and gksudo.
You probably already know how to use sudo -- just run sudo commandname . But what about running GUI apps that you want to run as root (or another user)? Simple -- use gksudo instead of sudo. For instance, if you'd like to run Ethereal as root, just pop open a run dialog box (Alt-F2) and use gksudo ethereal.
By the way, if you really must do work as root, you can use sudo su -, which will log you in as root. If you really, really want to have a root password that you know, so that you can log in as root directly (i.e., without using sudo), then run passwd when logged in as root, and set the password to whatever you want. I'd recommend using the pwgen package to create a secure password not only for root but for all your user accounts.
5. Add users to sudo
When you set up Ubuntu, it automatically adds the first user to the sudo group, allowing that user to make changes as the super user (root) by typing in their password. However, it doesn't automatically add additional users to the sudo group. If you want to give someone else superuser privileges on your shared system, you'll have to give them sudo access.
To add new users to sudo, the easiest way is to use the usermod command. Run sudo usermod -G admin username . That's all there is to it. However, if the user is already a member of other groups, you'll want to add the -a option, like so: sudo usermod -a -G admin username .
If you prefer the GUI way of doing things, go to System -> Administration -> Users and Groups. Select the user you want to add to sudo, and click Properties. Under the User privileges tab, check the box that says "Executing system administration tasks" and you'll be all set.
6. Adding a new desktop
Many users aren't sure what packages to add in order to run KDE or Xfce window managers on a stock Ubuntu system -- or what packages to add to run GNOME on Kubuntu or Xubuntu. You could add all of the necessary packages one at a time, but there's a much easier way to go about it.
To install all of the packages that come with one of the flavors of Ubuntu, such as Kubuntu, run apt-get install kubuntu-desktop (or edubuntu-desktop, xubuntu-desktop, or xubuntu-desktop).
If the GUI is more your style, the *desktop packages can be installed using Adept, Synaptic, or another package manager
7. How to reconfigure X.org
Most of the time, X.org -- that's the software that drives your video card and provides the foundation for the GUI, whether you're running GNOME, KDE, Xfce, or another window manager -- "just works" when you install Ubuntu. In fact, I'd wager that most Ubuntu users never even have to think about their video settings.
But, sometimes you need to reconfigure X.org because Ubuntu hasn't detected your video card and monitor properly, or maybe you've just purchased a shiny new video card and need to get it working with Ubuntu. Whatever the reason, it's good to know how to reconfigure X without having to edit your /etc/X11/xorg.conf by hand.
To run through the configuration, use dpkg-reconfigure xserver-xorg at the console or in a terminal window. Then you'll have a chance to specify your monitor and video card, the resolutions and color depths you want to run the server at, and so forth.
Since every setup is different, it's hard to give concrete advice for configuring X, but it's generally OK to accept the configuration defaults. Also, you'll be given a choice between Advanced, Medium, and Simple methods for giving your monitor's specifications. As a rule, it's probably best to go with Simple unless you really know what you're doing, or the Simple method doesn't work for you.
8. Log in automagically
By default, when you boot up the computer, Ubuntu will give you a login screen before you get to your X session. From a security perspective, this is a good idea, particularly in multi-user environments or in any situation where other people have physical access to your computer. Still, many users are used to just being logged in automatically, and don't want to fuss with logging in each time they reboot their desktop.
To set this in Ubuntu, go to System -> Administration -> Login Window. You'll need to provide your password, then you'll get the Login Window Preferences window with five tabs. Choose the Security tab and click Enable Automatic Login. If you have more than one regular user, make sure to specify which user should be logged in automatically.
Again, and I can't stress this enough, this is only a good idea for home computers where only one person has access to the computer. I don't recommend this for work computers or laptop/notebook computers, when someone else might have access to the machine.
9. Compiling from source
Ubuntu's package repository is huge, particularly when you factor in packages in the Universe and Multiverse repositories. However, many users find themselves needing to install packages from source, either because they want to use a newer package than is available in the repository, or they want to try something that's not in the Ubuntu repository at all.
If you want to install packages from source, you can use a few shortcuts to make life easier. First, you'll probably want to get the build-essential meta-package if you haven't installed any developer tools. Run sudo apt-get install build-essential; it will grab GCC, the Linux kernel headers, GNU Make, and some other packages that you'll probably need.
Next, if you're going to compile a package such as Gaim because a new version is out, you might be able to satisfy the new version's dependencies with the old version's dependencies. To do this, grab the package's build dependencies with sudo apt-get build-dep packagename . That will grab all of the development packages you need to build the package that's currently available in Ubuntu, and will probably satisfy dependencies for the new version you're compiling.
Finally, don't make install when you compile from source -- use CheckInstall instead. CheckInstall will create a Debian package and install it for you, so you can remove or upgrade the software more easily later on.
Grab CheckInstall with apt-get install checkinstall. After you've run ./configure ; make, just run sudo checkinstall and answer a few simple questions. Note that if you compile packages on AMD64, CheckInstall will select X86_64 as the architecture rather than amd64 -- which will cause the package install to fail, since Ubuntu expects amd64 as the architecture rather than X86_64.
By the way, the packages created by CheckInstall also make it easier to deploy the same package on several machines, if you happen to have several systems running Ubuntu. See Joe Barr's excellent CLI Magic feature on CheckInstall too.
10. A new kernel
Ubuntu will install a 386 kernel for x86 machines, which probably isn't what you'd want if you've got a Pentium II or better CPU. The 386 kernel is compiled to work with just about any x86 CPU, but extensions that appear in later CPUs can give your system a boost, if they're taken advantage of. To replace the kernel, open Synaptic or Adept and search for linux-image. You'll see several choices. Pick the one that best suits your CPU -- probably the linux-image-686 package for Pentium II and later CPUs, and linux-image-k7 for later AMD processors. Note that if you're using the AMD64 line (or Intel's x86-64 CPUs) you should be using the amd64 images.
Of course, once you install the new kernel, you'll need to reboot. Another benefit to the 686 kernels is that they have SMP support, which is a bonus for multi-core and Intel HyperThread CPUs.
If none of the tips cover questions that you have about Ubuntu, try checking out the Ubuntu wiki, forums, and mailing lists. As a rule, the Ubuntu users are a helpful lot, and you'll usually be able to find someone who's run into the same situation that you have questions about.
Now you have to add additional repositories , close synaptic package manager and type the following command in the terminal window (Application -> Accessories -> Terminal )
¨wget -q http://packages.medibuntu.org/medibuntu-key.gpg -O- | sudo apt-key add - ¨
and
¨sudo wget http://medibuntu.sos-sts.com/sources.list.d/feisty.list -O /etc/apt/sources.list.d/medibuntu.list
---------
SOURCE: http://ubuntuland.nireblog.com/post/2008/03/27/ten-tips-for-new-ubuntu-users
Adding the Medibuntu repos
Add Medibuntu to your sources.list, as well as its GPG key to your keyring. Make sure to use the correct sources.list that corresponds to your current distribution.
*
Ubuntu 8.04 "Hardy Heron":
sudo wget http://www.medibuntu.org/sources.list.d/hardy.list -O /etc/apt/sources.list.d/medibuntu.list
*
Ubuntu 7.10 "Gutsy Gibbon":
sudo wget http://www.medibuntu.org/sources.list.d/gutsy.list -O /etc/apt/sources.list.d/medibuntu.list
*
Ubuntu 7.04 "Feisty Fawn":
sudo wget http://www.medibuntu.org/sources.list.d/feisty.list -O /etc/apt/sources.list.d/medibuntu.list
*
Ubuntu 6.10 "Edgy Eft":
sudo wget http://www.medibuntu.org/sources.list.d/edgy.list -O /etc/apt/sources.list.d/medibuntu.list
*
Ubuntu 6.06 "Dapper Drake":
sudo wget http://www.medibuntu.org/sources.list.d/dapper.list -O /etc/apt/sources.list.d/medibuntu.list
Then, add the GPG Key:
sudo apt-get update && sudo apt-get install medibuntu-keyring && sudo apt-get update
*
Ubuntu 8.04 "Hardy Heron":
sudo wget http://www.medibuntu.org/sources.list.d/hardy.list -O /etc/apt/sources.list.d/medibuntu.list
*
Ubuntu 7.10 "Gutsy Gibbon":
sudo wget http://www.medibuntu.org/sources.list.d/gutsy.list -O /etc/apt/sources.list.d/medibuntu.list
*
Ubuntu 7.04 "Feisty Fawn":
sudo wget http://www.medibuntu.org/sources.list.d/feisty.list -O /etc/apt/sources.list.d/medibuntu.list
*
Ubuntu 6.10 "Edgy Eft":
sudo wget http://www.medibuntu.org/sources.list.d/edgy.list -O /etc/apt/sources.list.d/medibuntu.list
*
Ubuntu 6.06 "Dapper Drake":
sudo wget http://www.medibuntu.org/sources.list.d/dapper.list -O /etc/apt/sources.list.d/medibuntu.list
Then, add the GPG Key:
sudo apt-get update && sudo apt-get install medibuntu-keyring && sudo apt-get update
VMware Server On Ubuntu 8.04 Mini-Howto
When upgrading from Ubuntu 7.10 to 8.04 my VMware server stopped working, this what I had to do to get it up and running:
Needed if upgrading VMware installation:
sudo ./vmware-install.pl
VMware wont compile with the new kernel, use this patch:
wget http://vmkernelnewbies.googlegroups.com/web/vmware-any-any-update-116.tgz
tar -zxf vmware-any-any-update-116.tgz
cd vmware-any-any-update-116
Apply the patch:
sudo ./runme.pl
sudo vmware-config.pl
VMware console wont run without this:
cp /lib/libgcc_s.so.1 /usr/lib/vmware/lib/libgcc_s.so.1/libgcc_s.so.1
You might need gcc3.4 as well.
-----
SOURCE: http://www.howtoforge.com/vmware-server-on-ubuntu8.04
Monday 18 August 2008
How to join Ubuntu/Samba to a Windows 2003 Active Directory domain
How to join Ubuntu/Samba to a Windows 2003 Active Directory domain
Ingredients:
*
A Windows network with an Active Directory server (like Windows Server 2003)
*
Ubuntu Linux 5.10 installed
*
TCP/IP setup properly (the Linux machine taking its address by DHCP from the Windows server)
*
No firewall yet on the Linux machine! First get it working, then secure it.
More info:
*
http://us1.samba.org/samba/docs/man/Samba-HOWTO-Collection/domain-member.html
*
http://justlinux.com/forum/archive/index.php/t-118512.html
1. Installing
We assume that Ubuntu Linux has been installed.
Install the following packages with the Synaptic Package Manager. You may need to specify “universe” as an extra source for packages.
*
Samba (version 3):
o
samba
o
samba-common (installed by default)
o
smbclient (installed by default)
o
winbind
*
Kerberos:
o
krb5-config
o
krb5-user
*
... and any packages that might be needed to meet dependencies.
2. Edit configuration files
Edit the following configuration files. We assume the following:
*
The local DNS domain is mycompany.local
*
The Windows 2003 server is obelix.mycompany.local
/etc/samba/smb.conf
[global]
security = ADS
realm = MYCOMPANY.LOCAL
workgroup = mycompany
password server = obelix.mycompany.local
wins support = no
wins server = 10.0.20.202
invalid users = root
# Winbind settings
idmap uid = 10000-20000
idmap gid = 10000-20000
# For testing
debuglevel = 2
# A shared folder for testing purposes
[SharedFolder]
path = /home/onno2/Shared_Folder
available = yes
public = yes
writable = yes
force create mode = 0666
force directory mode = 0777
Make sure the path (/home/onno2/Shared_Folder or whatever you choose) exists and that the rights are set properly (chmod 777 or something similar)
/etc/krb5.conf
[libdefaults]
default_realm = MYCOMPANY.LOCAL
krb4_config = /etc/krb.conf
krb4_realms = /etc/krb.realms
kdc_timesync = 1
ccache_type = 4
forwardable = true
proxiable = true
# The following libdefaults parameters are only for Heimdal Kerberos.
v4_instance_resolve = false
v4_name_convert = {
host = {
rcmd = host
ftp = ftp
}
plain = {
something = something-else
}
}
[realms]
MYCOMPANY.LOCAL = {
kdc = obelix.mycompany.local
admin_server = obelix.mycompany.local
}
[domain_realm]
.mycompany.local = OBELIX.MYCOMPANY.LOCAL
mycompany.local = OBELIX.MYCOMPANY.LOCAL
[login]
krb4_convert = true
krb4_get_tickets = true
/etc/nsswitch
The only change here was adding winbind twice.
# /etc/nsswitch.conf
#
# Example configuration of GNU Name Service Switch functionality.
# If you have the `glibc-doc' and `info' packages installed, try:
# `info libc "Name Service Switch"' for information about this file.
passwd: compat winbind
group: compat winbind
shadow: compat
hosts: files dns
networks: files
protocols: db files
services: db files
ethers: db files
rpc: db files
netgroup: nis
3. Start or restart services
/etc/init.d/samba restart
/etc/init.d/winbind restart
4. Join domain
net ads join -U administrator If this doesn’t work, check the logs in Linux (/var/log/samba/*) and Windows.
5. Test your setup
testparm to check if your smb.conf has a correct syntax.
kinit onno@MYCOMPANY.LOCAL test if kerberos works properly.
wbinfo -u should give a list of users.
wbinfo -g should give a list of groups.
getent passwd should give a list of users in the passwd style.
getent group should give a list of groups.
ls -ltr /var/log/samba gives a list of log files, sorted by time of last change.
smbclient -L -U onno should give you a list of available shares.
If this all works properly, try to access the share (/home/onno2/Shared_Folder) from any Windows machine in the domain by using network neighbourhood.
What's next?
If all works, try setting up your favorite firewall. I like Shorewall.
----
SOURCE: http://www.onnoot.com/wiki/how_to_join_ubuntu_samba_to_a_windows_2003_active_%20directory_domain
Ingredients:
*
A Windows network with an Active Directory server (like Windows Server 2003)
*
Ubuntu Linux 5.10 installed
*
TCP/IP setup properly (the Linux machine taking its address by DHCP from the Windows server)
*
No firewall yet on the Linux machine! First get it working, then secure it.
More info:
*
http://us1.samba.org/samba/docs/man/Samba-HOWTO-Collection/domain-member.html
*
http://justlinux.com/forum/archive/index.php/t-118512.html
1. Installing
We assume that Ubuntu Linux has been installed.
Install the following packages with the Synaptic Package Manager. You may need to specify “universe” as an extra source for packages.
*
Samba (version 3):
o
samba
o
samba-common (installed by default)
o
smbclient (installed by default)
o
winbind
*
Kerberos:
o
krb5-config
o
krb5-user
*
... and any packages that might be needed to meet dependencies.
2. Edit configuration files
Edit the following configuration files. We assume the following:
*
The local DNS domain is mycompany.local
*
The Windows 2003 server is obelix.mycompany.local
/etc/samba/smb.conf
[global]
security = ADS
realm = MYCOMPANY.LOCAL
workgroup = mycompany
password server = obelix.mycompany.local
wins support = no
wins server = 10.0.20.202
invalid users = root
# Winbind settings
idmap uid = 10000-20000
idmap gid = 10000-20000
# For testing
debuglevel = 2
# A shared folder for testing purposes
[SharedFolder]
path = /home/onno2/Shared_Folder
available = yes
public = yes
writable = yes
force create mode = 0666
force directory mode = 0777
Make sure the path (/home/onno2/Shared_Folder or whatever you choose) exists and that the rights are set properly (chmod 777
/etc/krb5.conf
[libdefaults]
default_realm = MYCOMPANY.LOCAL
krb4_config = /etc/krb.conf
krb4_realms = /etc/krb.realms
kdc_timesync = 1
ccache_type = 4
forwardable = true
proxiable = true
# The following libdefaults parameters are only for Heimdal Kerberos.
v4_instance_resolve = false
v4_name_convert = {
host = {
rcmd = host
ftp = ftp
}
plain = {
something = something-else
}
}
[realms]
MYCOMPANY.LOCAL = {
kdc = obelix.mycompany.local
admin_server = obelix.mycompany.local
}
[domain_realm]
.mycompany.local = OBELIX.MYCOMPANY.LOCAL
mycompany.local = OBELIX.MYCOMPANY.LOCAL
[login]
krb4_convert = true
krb4_get_tickets = true
/etc/nsswitch
The only change here was adding winbind twice.
# /etc/nsswitch.conf
#
# Example configuration of GNU Name Service Switch functionality.
# If you have the `glibc-doc' and `info' packages installed, try:
# `info libc "Name Service Switch"' for information about this file.
passwd: compat winbind
group: compat winbind
shadow: compat
hosts: files dns
networks: files
protocols: db files
services: db files
ethers: db files
rpc: db files
netgroup: nis
3. Start or restart services
/etc/init.d/samba restart
/etc/init.d/winbind restart
4. Join domain
net ads join -U administrator If this doesn’t work, check the logs in Linux (/var/log/samba/*) and Windows.
5. Test your setup
testparm to check if your smb.conf has a correct syntax.
kinit onno@MYCOMPANY.LOCAL test if kerberos works properly.
wbinfo -u should give a list of users.
wbinfo -g should give a list of groups.
getent passwd should give a list of users in the passwd style.
getent group should give a list of groups.
ls -ltr /var/log/samba gives a list of log files, sorted by time of last change.
smbclient -L
If this all works properly, try to access the share (/home/onno2/Shared_Folder) from any Windows machine in the domain by using network neighbourhood.
What's next?
If all works, try setting up your favorite firewall. I like Shorewall.
----
SOURCE: http://www.onnoot.com/wiki/how_to_join_ubuntu_samba_to_a_windows_2003_active_%20directory_domain
Sites to learn linux
http://www.faculty.ucr.edu/~tgirke/Documents/UNIX/linux_manual.html
http://www.cyberciti.biz/
http://www.linuxhomenetworking.com/
http://www.linsec.ca/Home
http://www.linuxworld.com/
http://www.linux-mag.com/
http://www.cyberciti.biz/
http://www.linuxhomenetworking.com/
http://www.linsec.ca/Home
http://www.linuxworld.com/
http://www.linux-mag.com/
Install acrobat reader on ubuntu
CODE:
1. echo "deb http://packages.medibuntu.org/ hardy free non-free" | sudo tee -a /etc/apt/sources.list
2. wget -q http://packages.medibuntu.org/medibuntu-key.gpg -O- | sudo apt-key add - && sudo apt-get update
3. sudo aptitude install acroread
1. echo "deb http://packages.medibuntu.org/ hardy free non-free" | sudo tee -a /etc/apt/sources.list
2. wget -q http://packages.medibuntu.org/medibuntu-key.gpg -O- | sudo apt-key add - && sudo apt-get update
3. sudo aptitude install acroread
Thursday 14 August 2008
CD/DVD Burning in ubuntu
https://help.ubuntu.com/community/CdDvd/Burning?action=show&redirect=CdDvdBurning
http://ubuntuguide.org/wiki/Ubuntu:Edgy/CDDVDBurning#How_to_burn_Image_.28ISO.29_files_into_CD.2FDVD
http://ubuntuguide.org/wiki/Ubuntu:Edgy/CDDVDBurning#How_to_burn_Image_.28ISO.29_files_into_CD.2FDVD
Wednesday 13 August 2008
Dual Monitor Setup On Ubuntu 7.10
This is a Howto about getting 2 (or with small modifications more) monitors working on Ubuntu 7.10 as a single big screen.
Get it to work
Connect one monitor to VGA and one to DVI on your computer.
If you see the desktop in mirror mode on both monitors after you connected the second one, then you just have to do some few steps to get it in extended mode.
Don't touch the GUI Setting tool (displayconfig-gtk) for monitors, it won't work correctly and may destroy your xorg.conf
To see the identifier for your monitors you can use:
xrandr -q
See sample output below:
Screen 0: minimum 320 x 200, current 1280 x 1024, maximum 3200 x 1200
VGA connected 1280x1024+0+0 (normal left inverted right) 376mm x 301mm
1280x1024 60.0*+ 84.8 75.0 59.9
1280x960 84.9 59.9
1152x864 74.8
1024x768 84.9 75.1 70.1 60.0
832x624 74.6
800x600 84.9 72.2 75.0 60.3 56.2
640x480 84.6 75.0 72.8 66.7 60.0
720x400 70.1
TMDS-1 connected 1280x1024+0+0 (normal left inverted right) 518mm x 324mm
1920x1200 60.0 +
1600x1200 59.9
1680x1050 60.0
1280x1024 75.0* 59.9
1440x900 75.0 59.9
1280x800 74.9 59.8
1024x768 75.1 60.0
800x600 75.0 60.3
640x480 75.0 60.0
720x400 70.1
VGA is the identifier for my old 17" TFT that is connected with a VGA cable and TMDS-1 is my new 24" monitor that is connected with a DVI cable.
To find out, which resolution you have to set for the virtual display, you can use following command instead of calculating yourself ;-)
xrandr --output TMDS-1 --auto --left-of VGA
Sample Output:
xrandr: screen cannot be larger than 1920x1920 (desired size 3200x1200)
This output tells you the needed size of the virtual desktop that you have to enter in xorg.conf.
sudo pico /etc/X11/xorg.conf
There you go all the way down to the section "screen" and add "Virtual {X} {Y}" below the mode line:
Section "Screen"
Identifier "Default Screen"
Device "Intel Corporation Integrated Graphics Controller"
Monitor "Acer X243W"
DefaultDepth 24
SubSection "Display"
Modes "1920x1200" "1680x1680" "1600x1200" "1440x1440"$
Virtual 3200 1200
EndSubSection
EndSection
Now you have to reload your X-Server:
press ctrl+alt+backspace
Log in again and enter the command from the beginning in a console window.
xrandr --output TMDS-1 --auto --left-of VGA
You should now have an extended desktop where the left side of the desktop is on the big 24" monitor and the right side on the old 17" monitor. For xrandr you could also use following arguments for positioning:
--pos {x}x{y}
--left-of output
--right-of output
--above output
--below output
You can add the xrandr command to session startup scripts to have it executed automatically.
Adding to session startup on gnome
Go to: System > Preferences (Einstellungen) > Session (Sitzungen).
Add a task called "dualhead setup" and use the command
xrandr --output TMDS-1 --auto --left-of VGA
or whatever xrandr command you have.
There exists one problem... It's not enabled before you log in. If you know in wich init file you can put the command, please leave a comment or send me a PM.
Ubuntu blogs
All Scrubbed Up - Ubuntu for Medicine in South Africa
Garam Chai - the occasinal post about Ubuntu
Free Software Blog - Most of the posts are about Ubuntu
Arcane Code - a few posts about Ubuntu
Bluebones- the occasional Ubuntu post
Debian Admin - A few posts about Ubuntu too
Everything Else - Some Linux/Ubuntu posts
GrumpyMole - About Ubuntu and Xubuntu
Terminally Incoherent - Ubuntu/Linux Posts
Hawknotes - The occasional Ubuntu Post
Move /home to it’s own partition
Posted by Carthik in administration, guides, ubuntu.
trackback
Having the “/home” directory tree on it’s own partition has several advantages, the biggest perhaps being that you can reinstall the OS (or even a different distro of Linux) without losing all your data. You can do this by keeping the /home partition unchanged and reinstalling the OS which goes in the “/” (root) directory, which can be on a seperate partition.
But you, like me, did not know this when you first installed Ubuntu, and have not created a new partition for “/home” when you first installed Ubuntu. Despair not, it is really simple to move “/home” to its own partition.
First, create a partition of sufficient size for your “/home” directory. You may have to use that new hard drive, or adjust/resize the existing partition on your current hard-drive to do this. Let me skip those details.
Next, mount the new partition:
$mkdir /mnt/newhome
$sudo mount -t ext3 /dev/hda5 /mnt/newhome
(You have to change the “hda5″ in the above to the correct partition label for the new partition. Also, the above assumes that the new partition you created is formatted as an ext3 partition. Change the “ext3″ to whatever filesystem the drive is formatted to.)
Now, Copy files over:
Since the “/home” directory will have hardlinks, softlinks, files and nested directories, a regular copy (cp) may not do the job completely. Therefore, we use something we learn from the Debian archiving guide:
$cd /home/
$find . -depth -print0 | cpio –null –sparse -pvd /mnt/newhome/
Make sure everything copied over correctly. You might have to do some tweaking and honing to make sure you get it all right, just in case.
Next, unmount the new partition:
$sudo umount /mnt/newhome
Make way for the new “home”
$sudo mv /home /old_home
Since we moved /home to /old_home, there is no longer a /home directory. So first we should recreate a new /home by:
sudo mkdir /home
Mount the new home:
$sudo mount /dev/hda5 /home
(Again, you have to change “hda5″ to whatever the new partition’s label is.)
Cursorily verify that everything works right.
Now, you have to tell Ubuntu to mount your new home when you boot. Add a line to the “/etc/fstab” file that looks like the following:
/dev/hda5 /home ext3 nodev,nosuid 0 2
(Here, change the partition label “hda5″ to the label of the new partition, and you may have to change “ext3″ to whatever filesystem you chose for your new “home”)
Once all this is done, and everything works fine, you can delete the “/old_home” directory by using:
$sudo rm -r /old_home
Michael, Russ and Magnus posted this solution on the ubuntu-users mailing list a few months ago.
Tuesday 12 August 2008
Install an RPM Package on Ubuntu Linux
Installing software on Ubuntu usually entails using Synaptic or by using an apt-get command from the terminal. Unfortunately, there are still a number of packages out there that are only distributed in RPM format.
There's a utility called Alien that converts packages from one format to the other. This doesn't always mean that an rpm will work on your system, though. You will need to install some prerequisite software packages in order to install alien, however. These packages include gcc and make.
Run this command to install alien and other necessary packages:
sudo apt-get install alien dpkg-dev debhelper build-essential
To convert a package from rpm to debian format, use this command syntax. The sudo may not be necessary, but we'll include it just in case.
sudo alien packagename.rpm
To install the package, you'll use the dpkg utility, which is the internal package management tool behind debian and Ubuntu.
sudo dpkg -i packagename.deb
The package should now be installed, providing it's compatible with your system.
Install WINE on Ubuntu Gutsy
Latest install instructions are always at: WineHQ.org
Add repository key:
wget -q http://wine.budgetdedicated.com/apt/387EE263.gpg -O- | sudo apt-key add -
Add repository to apt sources:
sudo wget http://wine.budgetdedicated.com/apt/sources.list.d/gutsy.list -O /etc/apt/sources.list.d/winehq.list
Update apt sources:
sudo apt-get update
Install WINE:
sudo apt-get install wine
The program menu then appears in Programs under Wine, or double-click a Windows/DOS .exe file.
Howto: Create ISO File From CD/DVD in Ubuntu Gutsy
Have a CD or DVD lying around that you are sick of putting in the drive every time you need something on the disc How about just making an .iso file that you can mount as you need? Or maybe you just want a “master” copy of the media so you can create another copy at a future date.
At any rate it is rather easy to accomplish in Ubuntu:
sudo umount /dev/cdrom dd if=/dev/cdrom of=file.iso bs=1024
You can also do the same with folders:
mkisofs -r -o file.iso /location_of_folder/
Don’t forget to make a checksum:
md5sum file.iso > file.iso.md5
----------
Source: http://swik.net/Ubuntu/Only+Ubuntu/Howto:+Create+ISO+File+From+CD%2FDVD+in+Ubuntu+Gutsy/b3ibi
Easy way of Mount/Unmount .iso Images in Ubuntu
Gmount-iso is a small tool written using PyGTK and Glade. It allows you to easily mount your cd images. This is a frontend to the ‘mount -o loop -t iso9660 foo.iso /mountpoint’ command.
Install gmountiso in Ubuntu
sudo aptitude install gmountiso
This will complete the installation.
Using gmountiso
If you want to open go to Applications—>System Tools—>Gmount-iso
Once it opens you should see the following screen here you can specify your .iso file and mount point where you want to mount.
Example for gmountiso
I am having dsl-4.0.iso image on my desktop and i want to mount this under dsl directory so i have menctioned all the details and click on mount
This will prompt for root password enter your root password and click on ok
Once it finished mounting you can see these details under mounted images
You can see the files and folders inside dsl directory
If you want to unmount just select the your mount point and click on Unmount
This is very simple and easy process
-----------
Source: http://www.ubuntugeek.com/easy-way-of-mountunmount-iso-images-in-ubuntu.html
Mount and Unmout ISO images without burning them
Some times you want to use iSO images without burning them.If you don’t want to waste your CD’s/DVD’s here is the simple possible solutions using these tips you can mount and unmount ISO images without burning them.
----------------
Source: http://www.ubuntugeek.com/mount-and-unmout-iso-images-without-burning-them.html
I know two possible solutions
1) Using Nautilus Scripts
2) Using kernel loop module
Now we will see each one in detailed
Using Nautilus Scripts
I am taking this tip from here first you need to download two scripts for mount iso images download from here for unmount iso images download from here
Once you have these two scripts you need to change the permissions using the following commands
sudo chmod +x /home/username/mount.sh
sudo chmod +x /home/username/unmount.sh
Now you need to copy them nautilus scripts
sudo mv /home/username/mount.sh ~/.gnome2/nautilus-scripts/
sudo mv /home/username/unmount.sh ~/.gnome2/nautilus-scripts/
That’s it now you are ready for mounting and unmounting your ISO images.
Example
Mount ISO Image
Now i have one ISO image if you want to mount you need to right click and select scripts —> mount-iso

Now it will prompt for root password and click ok

You can see the Mounter notification like the following

Here is the Successfully mounted message if you want to open this one click ok
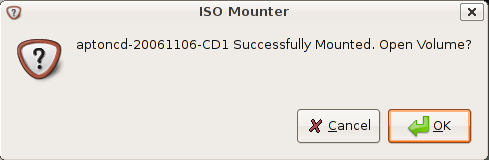
This shows you available contents in mounted ISO image

Unmount ISO Image
Now i have one ISO image if you want to mount you need to right click and select scripts—>unmount-iso

Here is the Successfully Unmounted message

Using loop Kernel Module
First you need to make the directory to put the ISO into using the following command
sudo mkdir /media/isoimage
Now you need to add the loop module to your kernel.
What kernel loop module does?
I want to give brief introduction to kernel loop module.Using the module loop it is possible to mount a filesystem file. squashfs is a “loop” with (de)compression (Compressed Loopback Device) and it is possible to mount a compressed filesystem like a block device and seamlessly decompress its data while accessing it.
Use the following command to load loop module
sudo modprobe loop
Mount ISO Image
If you want to mount you need to use the following command
sudo mount debianetch.iso /media/isoimage/ -t iso9660 -o loop
In the above command you can replace debianetch.iso to your own iso image.
Now you should have your iso file mounted, and accessible from your desktop.
Unmount ISO Image
Unmount ISO Image Using the following command
sudo umount /media/isoimage
----------------
Source: http://www.ubuntugeek.com/mount-and-unmout-iso-images-without-burning-them.html
Install Real player on ubuntu gutsy
wget -c http://www.debian-multimedia.org/pool/main/r/realplay/realplayer_10.0.8-0.1_i386.deb
sudo dpkg -i realplayer_10.0.8-0.1_i386.deb
sudo dpkg -i realplayer_10.0.8-0.1_i386.deb
Monday 11 August 2008
Install Adobe Flash player
Now that the trusted Synaptic had failed me, so I went ahead to install Flash plugin myself.
I went to the Adobe Flash for Linux site and downloaded the Flash Player tar.gz file. The file got downloaded to my Desktop.
From then the installation was as simple as these steps.
1. Open terminal. Applications->Accessories->Terminal
2. Change directory to Dektop by running the command "cd Desktop", without the quotes.
3. run the command "tar zxvf install_flash_player_9_linux.tar.gz".
4. This will create a folder/directory called "install_flash_player_9_linux".
5. "cd install_flash_player_9_linux".
6. Finally run the installer "./flashplayer-installer".
The installer will ask to close any running instance of Firefox and will install the Flash plugin.
You may verify the plugin by againg starting Firefox and typing "about:plugins" in the address bar
Thursday 7 August 2008
Wednesday 6 August 2008
Error when umount cd-rom: unmount: /cdrom device is busy
In order to solve this problem. Run umount command as follows:
# cd /
# umount /cdrom
If problem still continues then forcefully unmount the cdrom:
# cd /
# fuser -km /cdrom
OR try the following command:
# cd /
# umount -l /mnt
# cd /
# umount /cdrom
If problem still continues then forcefully unmount the cdrom:
# cd /
# fuser -km /cdrom
OR try the following command:
# cd /
# umount -l /mnt
Subscribe to:
Posts (Atom)